G
Guest
Guest
**Someone was looking for this, so reposting in the sticky thread as the original instruction thread had fallen to the archives.**
12/30/06 Note: with the new "feature" of the deco tool (I think raise limit is 8 layers now?) you can modify the instructions and place the filigree LAST. If you target it just right, it will plop somewhere near the top of your finished post, and you will only need to raise it 2 - 4 times. Disclaimer: I cannot be held responsible for any frustration as a result.

-------------------------------------------------------------------------
Want to give the hint to visitors to keep their dirty fingers off the rare works of art in your in-game gallery or the treasures in your museum? Want to keep orcs from cutting in line at your theater?
Well, now you can have an elegant "velvet rope" barrier, that is made from easily obtainable materials, is flexible in its placement (north-south, east-west, one section or many), and best of all, does not actually impede movement within a house!

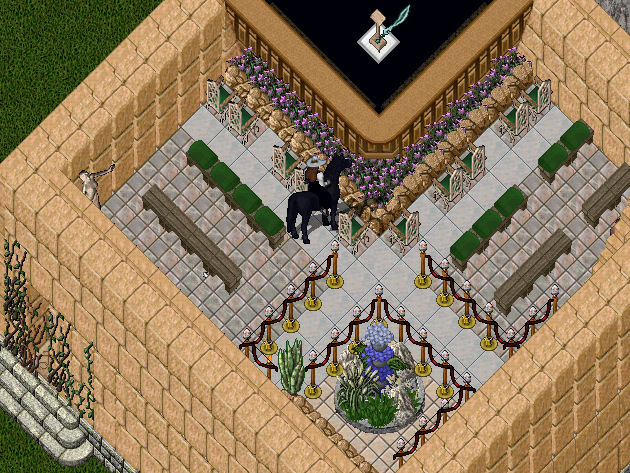
Below is an example of the use of the velvet rope curtain, in an auction house which I decorated, on Siege Perilous. (Building designed by Athena of the Ghost Runners).
Now, on to how to make it!
<u>Materials:</u>
Post:
1 golden plate (player craftable with tinkering skill)
1 mortar & pestle (player craftable with tinkering skill)
1 jeweled filigree (player craftable with tinkering skill)
1 torch (purchased from NPC provisioner)
Rope sections:
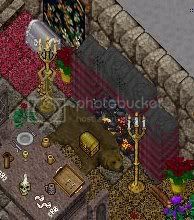
For a curtain that runs north - south, you will need bows that have their curved part facing east. These are the kind that can be player crafted using the fletching/bowcraft skill. To make them red, you need to be a GM fletcher, with Mondain's Legacy, and use bloodwood.
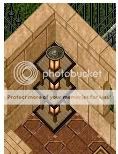
For a curtain that runs east - west, you will need bows that have their curved part facing south, like this:

These can only be obtained as loot from monsters. Ratman archers and Juka lords were suggested to me, as being the best bet for consistently getting bows as loot. As a lukewarm PvMer, I personally found it easiest to pester my fellow players to death for them
. (Note: not all monster loot bows face south, but as far as I know, all south facing bows are monster looted ones). The crummier the bow, obviously, the better it will survive being enhanced with bloodwood to make it red in color.
*edit* - it was pointed out to me that you can use the deco tool to turn regular east facing crafted bows to face south. I found that surprising since other weapons cannot be turned, but that sure is a whole lot easier than getting the monster loot south facing bows!
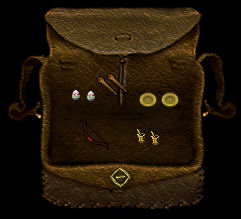
You will need 2 post assemblies, and one bow facing in the desired direction, for every curtain section you want to construct. In the bag below, are the materials to construct one section of a rope curtain that runs east - west.
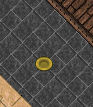
Step 1
Lock down the first plate where you want the base of your post to be.
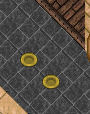
Step 2
Lock down a second plate one tile from the first (where you place it, depends on which direction you will be building your curtain).
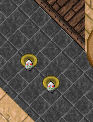
Step 3
Lock down a jeweled filigree on each plate (target slightly in front, and it should land very close to the plate, as shown).
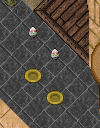
Step 4
Using your interior decorator tool, raise each jeweled filigree 12 times.
Step 5
Double-click on a torch in your pack, to ignite & equip it. Drop the lit torch on one of the plates, and lock it down. Repeat with second torch and plate.
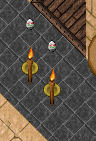
Step 6
Using your interior decorator tool, raise each torch 5 times.

Step 7
Take a bow, and target a point between your two base plates. When dropped correctly, the bow will span your two bases, almost perfectly. Lock down the bow, then using your interior decorator tool, raise the bow 6 times.

Step 8
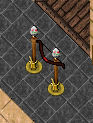
Using your interior decorator tool, lower each jeweled filigree 2 times (you should just barely be able to see the junction point where the flame emerges from the torch. If it is too high, you will see the rounded part of the flame, and if too low, the pointed tip of the flame will peek through the top of the filigree.)

Step 9
Drop a mortar and pestle on each plate "base" and lock it down.
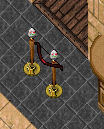
Step 10
Using your interior decorator tool, raise each mortar & pestle once. You now have a completed curtain section!
A few notes: this is the most straightforward way to make the curtain, but it assumes you have clear space all around. You may have to fuss a bit (as I did) if you have other objects occupying your "layers" but over all, placing them was very easy.
Hope you find this useful, and happy roping!
-Skylark
12/30/06 Note: with the new "feature" of the deco tool (I think raise limit is 8 layers now?) you can modify the instructions and place the filigree LAST. If you target it just right, it will plop somewhere near the top of your finished post, and you will only need to raise it 2 - 4 times. Disclaimer: I cannot be held responsible for any frustration as a result.
-------------------------------------------------------------------------
Want to give the hint to visitors to keep their dirty fingers off the rare works of art in your in-game gallery or the treasures in your museum? Want to keep orcs from cutting in line at your theater?
Well, now you can have an elegant "velvet rope" barrier, that is made from easily obtainable materials, is flexible in its placement (north-south, east-west, one section or many), and best of all, does not actually impede movement within a house!
Below is an example of the use of the velvet rope curtain, in an auction house which I decorated, on Siege Perilous. (Building designed by Athena of the Ghost Runners).
Now, on to how to make it!
<u>Materials:</u>
Post:
1 golden plate (player craftable with tinkering skill)
1 mortar & pestle (player craftable with tinkering skill)
1 jeweled filigree (player craftable with tinkering skill)
1 torch (purchased from NPC provisioner)
Rope sections:
For a curtain that runs north - south, you will need bows that have their curved part facing east. These are the kind that can be player crafted using the fletching/bowcraft skill. To make them red, you need to be a GM fletcher, with Mondain's Legacy, and use bloodwood.
For a curtain that runs east - west, you will need bows that have their curved part facing south, like this:
These can only be obtained as loot from monsters. Ratman archers and Juka lords were suggested to me, as being the best bet for consistently getting bows as loot. As a lukewarm PvMer, I personally found it easiest to pester my fellow players to death for them
*edit* - it was pointed out to me that you can use the deco tool to turn regular east facing crafted bows to face south. I found that surprising since other weapons cannot be turned, but that sure is a whole lot easier than getting the monster loot south facing bows!
You will need 2 post assemblies, and one bow facing in the desired direction, for every curtain section you want to construct. In the bag below, are the materials to construct one section of a rope curtain that runs east - west.
Step 1
Lock down the first plate where you want the base of your post to be.
Step 2
Lock down a second plate one tile from the first (where you place it, depends on which direction you will be building your curtain).
Step 3
Lock down a jeweled filigree on each plate (target slightly in front, and it should land very close to the plate, as shown).
Step 4
Using your interior decorator tool, raise each jeweled filigree 12 times.
Step 5
Double-click on a torch in your pack, to ignite & equip it. Drop the lit torch on one of the plates, and lock it down. Repeat with second torch and plate.
Step 6
Using your interior decorator tool, raise each torch 5 times.
Step 7
Take a bow, and target a point between your two base plates. When dropped correctly, the bow will span your two bases, almost perfectly. Lock down the bow, then using your interior decorator tool, raise the bow 6 times.
Step 8
Using your interior decorator tool, lower each jeweled filigree 2 times (you should just barely be able to see the junction point where the flame emerges from the torch. If it is too high, you will see the rounded part of the flame, and if too low, the pointed tip of the flame will peek through the top of the filigree.)
Step 9
Drop a mortar and pestle on each plate "base" and lock it down.
Step 10
Using your interior decorator tool, raise each mortar & pestle once. You now have a completed curtain section!
A few notes: this is the most straightforward way to make the curtain, but it assumes you have clear space all around. You may have to fuss a bit (as I did) if you have other objects occupying your "layers" but over all, placing them was very easy.
Hope you find this useful, and happy roping!
-Skylark