• Hail Guest!
    We're looking for Community Content Contribuitors to Stratics. If you would like to write articles, fan fiction, do guild or shard event recaps, it's simple. Find out how in this thread: Community Contributions
  • Greetings Guest, Having Login Issues? Check this thread!
  • Hail Guest!,
    Please take a moment to read this post reminding you all of the importance of Account Security.
  • Hail Guest!
    Please read the new announcement concerning the upcoming addition to Stratics. You can find the announcement Here!

The art of decorating

  • Thread starter imported_Freyja
  • Start date
  • Watchers 0
I

imported_Freyja

Guest
I've noticed a few good design descriptions lately and it would be great to get those ideas collected in one thread.

Feel free to post your 'how to make a ....' in here. /php-bin/shared/images/icons/smile.gif
 
L

Lord Sheep

Guest
Ok, I have a new tip with the SE expansion

I was wondering what a goza was, so I bought one and was very disappointed at how it looked. However, I found out a nice use for them.

If anyone uses double doors for entrances, the brocade goza, or goza, or whatever makes an Excellent Door Mat. Seriously, it looks wonderful in front of double doors. My house's primary colors are green and yellow (my guild's colors), so I put barbed leather gozas in front of quite a few of my double doorway entrances.

If I knew of an image host, I'd show you, but take my word, if your looking for something nice to put near a double door, use a goza :p

More tips:
-A good homely touch is a hearth of the home fire with a brown bear rug in front of it.
-I haven't tested this yet, but I think the craftable tower scupture would look nice with a lantern on top of it (oldstyle lantern)
-If you use a small stretched hide on the side of a stone table facing south, it looks like it's leaning on it, which is pretty neat.
 
T

T'ari

Guest
Take a yellow color candle, place a paper lantern on top and raise it a bit it will look like a table lamp.
 
G

Guest

Guest
I'll be posting this basic how too - using the pointy new hats for a lamp shade and 3 silver for a lamp pull chain.. can use the old heating stand/lantern, the statue or the new paper lanterns..... all look great.
 
B

BrNz

Guest
lol, did that one the other night... they do look pretty good... I didn't add the chain though (running low on lockdowns)
 
F

Fig

Guest
Just a note to do a flower box that I sent you a picture of, bigger than 2 tiles across you need to place a teleporter in the middle so you can place the flowers inside the walls after you finish decorating. If you have any other teleporters in the house it can look bad when you use them, so stick a purple net underneath the flowers to hide the teleporter.
 
M

Mierin

Guest
I need some guides on how to make water fountains...you know the larger "three-tiered" ones, not the skinny single flow ones....anyone have any idea what i'm talking about?
 
W

wendylady

Guest
If you have lanterns raised to look like their hanging on your walls, place a mistletoe over them, looks great. /php-bin/shared/images/icons/smile.gif
 
G

Guest

Guest
by viewing this thread, i made it 1337
but by reading this reply, you have made it 1338.
thanks for ruining a good thing!
 
V

vixen25

Guest
Try using cut up cloth, pewter bowls, and cotton. And of course fish. We would also decorate with sea shells. At the time we used fishsteaks to stack everything with.

You just have to be creative.

The pewter bowl and cotton were in the middle to make the water fall effect.
Just a warning, this takes up a lot of lock downs.
 
C

Cerra

Guest
I found a nice use for the new goza's /php-bin/shared/images/icons/smile.gif All my guildmates loved my new disco floor! The third floor I did with black goza's so the whole floor looks as though it has black carpeting!

 
G

Guest

Guest
Well I was afraid my FAQ would drop off into oblivion, but there is no actual sticky thread I can append it to that is appropriate for it, so I guess I'm shuffling it in here.

Roof FAQ
 
C

Cerra

Guest
"It Hurts My Eyes!!!! Reminds me of a Justin Timberlake Video. "

LOL I wouldn't know - not a timberlake fan myself but hey - ain't knocking those that are /php-bin/shared/images/icons/wink.gif
 
F

Fig

Guest
Neither am I but I still watch music videos /php-bin/shared/images/icons/laugh.gif
Can anyone recommend a free site to post jpegs that I can show people my designs from?
 
B

BrNz

Guest
For some reason reminds me of the Partridge Family's house. /php-bin/shared/images/icons/smile.gif

Just crazy...
 
A

AtlMoonStar

Guest
a keg tap against a wall and some silver coins stacked under it make a good outside faucet or hose faucet, and a good inside faucet for bath or sink.
back in the day , i had a villa and had that on porch, with a water bucket (apple barrel?)underneath.. and cotton as bubbles.. i didn't know about filling them with water back then heh.

i like that table lamp idea, I'll have to try it.

here is a cute porch idea.. it's a work in progress.. every daymy place

ignore the ugly goza mats hehe, i stole that idea from someone's house, i just did it to attract attention to potential vendor shoppers. <font color="purple"> been trying to find a use for those moonstones? they make great pebbles </font>
 
C

Clem

Guest
very interresting topic , im going to check back here often i guess , cause i always like new ideas to try out in my house :)

oh btw i made a brewy potion (as in shaken) with a horn of retreat on top of
grizeldas extra strength hangover cure , goes nicely in bars im sure
 
J

Jar_jar_binks

Guest
Here is the roof of my large tower (work in progress)


I plan on making the area between the 3 huts into either a garden style area or as similar to a small town as i can make it, using plants, rocks and whatever else i can get my hands on etc. (Lacking the required funds though
)

Oh yeah, and the roof is made from layed out bedrolls (use 2 small tables and 4 single logs to place them at the correct height) and the walls can not be walked though thanks to the use of small crates.


Takes about 4 hours to make one of those huts, assuming you know what you are doing.
 
D

Demulus

Guest
Not a brand new idea but I like it better this way...

I saw the "Standing Armor" tutorial at the Castles and Courtyards website.

I realy liked the idea but actualy didnt like how the look of that one got out. (no offence realy, afterall it gave me inspiration
)

So here is what I modified. Instead of a chaos shield and a globe I used a dress form as a base and dyed it in the metal color.
Cause it fits so perfectly I gave the dress form a platemail do. Now we dont have that missing area between the body and the helmet anymore.


Instead of a longsword I used an ornate axe as weapon. Just more to see then.
After having that I wasnt fine with the lots of free space at the stand of the dress form.
So I added platemail suneate and put them to just look out under the shield about half. Thats the best way I could think of making legs.
And afterall there are armors that dont have lower leg protection to give more freedom to move. Saw one of that kind in a museum a few years ago. Just forgot which city it was.
It makes the new workshop of my crafter automaton Kain look a little better now.
Anyways here is how it got that way. Hope somebody likes it maybe.


Now I got three floors of my large tower to be decorate still.
Oh my...
 
G

Guest

Guest
That looks fantastic! You should submit it to castles and courtyards as an alternate way to make standing armor, so more people can see it.
 
D

Demulus

Guest
If you think so.
First of all I have to try it a few times to find the best order to place the items. Gets a bit of messy in the wrong order like the helmet dropping down when lowering the suneate.

Nice that you like it. Thank you.
 
G

Guest

Guest
<font color=red>DECORATING TIPS</font color=red>

Placing vines and other objects outside walls on different floors

<font color=blue>Xanth de Orlig</font color=blue>

I too say temp teleporters/floor tiles on outside of wall, works great, place the vines and raise as you like em then delete the tele/floor tiles. That is what i did at this house for some creeping vines:


Turning a barkeep

<font color=blue>Xanth de Orlig:</font color=blue>

tip her from the direction you'd like her to face, that should do it i think...

<font color=blue>C. Highwind:</font color=blue>

If you are the house owner, you can also say the name of the barkeep to face in the direction you are speaking from.

<font color=blue>Kurgan:</font color=blue>

I think you can even if there is a bar in the way.
Just go into the customize menu for them, don't change anything, but click OK.
They then spout something and turn towards you.

Placing objects by axing containers

<font color=blue>Schimmy:</font color=blue>

I used an Elven Dresser deed to use as a container. I put the swords inside and when I hit the dresser with a hatchet I get the deed back and the swords down where I wanted them. No more wasting logs!

Placing banners on towers

<font color=blue>Salem de Monfort:</font color=blue>

1. Place one basic table on top of another.
2. Place two boards.
3. Place two ingots.
4. Place two more boards on top of the ingots, due not miss and stack with other boards.
5. Place two more ingots....
6. Two more boards...
7. The last two ingots.....because it will not let you stack anymore.
8. Click on the banner, then click on the top two ingots. It will then place. It might slip down a bit after you remove everything, but just play with it or let it hang as is. Not sure about the post above mentioning the death robe. I don't know what that is all about.

<font color=blue>Slayer BHG:</font color=blue>

The method that I found to work the best is the following:

Take a single gold coin. Lock it down on the same tile you wish to place the banner. then using the house tool, raise the coin to its higest point. Once it is up there, use the banner deed, and target the coin directly.

This causes it to think it is at that level (of the coin), and places one level up from there.

I use this technique on chessy Ice island (look for the White Marble Castle near the southern section of the island)

Arranging objects on tables

<font color=blue>Desperado SE:</font color=blue>

You can do one of two things. Stack them both on top of one another and then use an interior decorator tool to raise the top item higher. Or place the first item on the table, raising it with the decorator tool and then place the second item on the floor in the tile directly south-east of the table and raise it into place with the decorator tool.

<font color=blue>jcesare:</font color=blue>

FYI besides using the tool there is something else to consider. Some objects will appear to have a specific spot on the tile where they drop (it's not an actual spot but more how the graphic is rendered). This is especially true with items that can be "turned" with the tool. Think of each tile having quadrants: NW NE SW SE. Certain things like glass beakers and test tube racks can be turned and their orientation will change from NE to SW (BTW, with glassware, the liquid color will also change). Using the right combination of items will give you more choices and appealing results.

To get the gist of what I'm talking about, find a single tile somewhere that you can easily identify as a square, and drop stuff on it. You'll notice that some items appear centered and some offset. Sometimes you can get the desired effect by placing the item on an adjacent tile and raising it. Also, sometimes it's easier to lock down and raise items, then place the table underneath, then lower the items. Practice makes perfect.

Placing items on a bar

<font color=blue>Desperado SE:</font color=blue>

Just target the bottom edge of the bar and the item should jump tot he top of it then. If you have troubles with it, PM me and I'll grab a char on your shard and show you how to do it.

<font color=blue>CrimsonRose:</font color=blue>

Try having circle of transparency on and up fairly high...it allows you to see the floor tile under the bar and helps put things on the top.
Circle has helped me place alot of stuff in my house that normally wouldnt place.

<font color=blue>Xanth De Orlig:</font color=blue>

I would say try to place the item just infront of the bar, they kinda hop up on there... or circle of trans exactly...

also circle of trans or hitting ctrl-shift will help you retrieve items that hop under bars and things. ctrl-shift will pull up all the 'title bars' of the items.

<font color=blue>jcesare:</font color=blue>

Zoom in so you get finer control on your drop. Target the bar to highlight it and back off until it is no longer highlighted. If you zoom in you'll notice the bar doesn't fill the entire tile square. You need to hit the pixel that is in the tile but not used by the bar graphic.

Raising arcane circles

<font color=blue>Sarsmi:</font color=blue>

Ok I got on test center, arcane circles are made of 8 pieces, 2 tiles on the north side, then 3 in the middle, and 3 more on the south side. You can lock down all 8 tiles, go into customize mode and commit, then be able to raise them all you want. However they do work like goza mats in this respect, if you raise them more than a couple tiles they will block movement, so raising them up 2 is probably optimal.


Placing Items Behind Walls

<font color=blue>jcesare:</font color=blue>

I'm in the middle of decorating my new home. I built a small workshed in the NE corner and I noticed that I can drop an "Unfinished Barrel found in a shipwreck" behind the east-facing wall. It really looks good next to my workbench and fills in what would be an otherwise empty tile. The only other objects I can find that are able to be placed behind walls are certain plants.

<font color=blue>GabryaelPax:</font color=blue>

I've always prefered to make the west sides and north sides (actually taken up by walls/columns/arches/etc.) places for plants, especially the boundary walls at the edges of my plots. Have found that the old stone statues can be placed "inside" walls. Also, many multi-tile deeded items like rugs, abattoirs, arcane circles and the like can go right through walls. Besides those, things like water troughs, anvils, and small forges (not sure about the large) can be placed under arches (which are really wall tiles), so perhaps they can also be placed where there's an actual wall-looking wall tile. though why you'd want to place items like that "inside" a wall...? But just thought I'd mention them.

It's really just a matter of trial and error when discovering what will bypass the wall-only-on-this-tile rule. Just grab a bunch of different things you would like to display, and try them out.

Placing stone ovens

<font color=blue>Voluptuous:</font color=blue>

I'm assuming you are placing this thing on the main or second floor of your house. Because the oven will poke up into the next floor level, it will not place if you have floor tiles placed directly above it. You must remove the tiles.

Now. This is damned unslightly for most players having that chimney poking up on the next floor, and many have built walls around the ugly thing. It'll take a few tries at customizing, but you will eventually come up with a placed and disguised oven.

<font color=blue>Lady Sarissa'</font color=blue>

Hmm, I've not had any problems placing either stove or Hearth of the Homefire. It does stick up to the next floor but that can be made to look like a planter or well ect. If you have a custom house you might need to put it on the roof tho. If you have a prefab castle, keep ect. you can place and as I mentioned make a planter ect.. out of the chiminy that pokes up to the next floor.

Raising house add-ons in classic homes

<font color=blue>MissEcho:</font color=blue>

Actually the way it is done is not as per Sarsmi's method as Castles can't be customized so you can't lock down, go into customize mode then lift. Having experimented for hours I finally worked out how to do it in a Classic house but it works as well in a customizable and is a actually quite simple. Much simpler than having to go into customize as well and as you see it works for all things, circles, pentagrams, rugs etc.

Basically:
Step 1: put down 9 SINGLE goza's (3 x 3 x 3) on the tiles intended for the item.
Step 2: raise each goza two tiles with deco tool
Step 3: place rug or whatever on the raised goza's. (I then lock it down on each of the nine tiles that the addon covers)
Step 4: remove the gozas with an axe being careful not to chop your circle etc. (On rugs where you can't get to the middle goza as it is under the back of the bear, dismount and remount and it should flip the one in the middle to the top, so you can chop it then).
Step 5: relay whatever gozas you want underneath, they will place directly on the floor.

You will know if it is 'right' if when you walk over the circle, rug etc you can 'feel' yourself rise and fall.

So simple when you think about it, just took me hours of messing about to finally figure out how to make it work. You can't raise it more than 2 if you wish to walk over it as it blocks, however, technically you can raise it as high as it will go, so on the watertroughs for example, some of those are raised by ten-twelve. In the case of troughs, you just leave the two single gozas underneath them as they stay hidden, depending on the height you can then do other deco under or over them.

It also works the same for stone tables and I guess for pretty much any addon you like, so in the east wing downstairs, see above, those tables are 'stacked' one on top of the other, allowing two layers of deco display on one row of tiles. Also raised in those pics are two of the aquariums, in the same manner so that they can go against the closest tile to the wall, and lifted so that can still click on them to feed maintain etc without having to have circ of transparancy on to see them.


Re-deeding add-ons that are out of reach

<font color=blue>Shadøwfæ:</font color=blue>

With any deeded thing on the roof all you have to do is use an axe on it from an area where you can see it. Next, walk underneath where it is located and have a macro set to do last object/last target and that will get it to redeed.

Chopping add-ons

<font color=blue>Sarsmi:</font color=blue>

You can lock down and "chop" different parts of add-ons that are placed in any custom home. Simply lock down the parts of the add-on that you wish to remain behind, then enter customize mode and exit. The parts you did not lock down will now be gone, and can even be raised:


Reaching add-ons in out of the way places

<font color=blue>Shadøwfæ</font color=blue>

With any deeded thing on the roof all you have to do is use an axe on it from an area where you can see it. Next, walk underneath where it is located and have a macro set to do last object/last target and that will get it to redeed.


Turning a Barkeep

<font color=blue>Desperado SE</font color=blue>

Stand beside it in the direction you want it to face and just say its name. It will turn to face you then and be in the direction your wanting.
 
G

Guest

Guest
<font color=red>ITEMS</font color=red>

Deco Suggestion: Arcanist Statue

<font color=blue>Hazard:</font color=blue>

I've found that these specific statues (with the arm outstreched) look good holding items aloft: Lanterns, fishing poles, pickaxes.... just grab your deco tool, place whatever item you want next to the statue, raise the item until the statue looks like its holding it... and you have a themed statue!

Alternatively the warrior statue can be used as a large 'vase' if you raise certain vegetation to cover the head. (although the sword still kind of sticks out a bit)

<font color=blue>Voluptuous:</font color=blue>

those strands of shells from ML looks very good on em.

Brightest Light?

<font color=blue>Zephyr2:</font color=blue>

I think the brightest would have to be the lantern that came with Tokuno expansion. I can't remember if it's the paper lantern, think it is. That lets out so much light, I pulled them down and replaced them. Lanterns would come in 2nd for brightness, but a good type of brightness.

A few more observations:

Candlebras and lampposts seem to light up the most floor space.

Tinker-made burners (looks like a candle with a metal halo/stand) seem to give the most muted light and work well under plants for a soft glow.

<font color=blue>Hemisphere:</font color=blue>

Little tip for lighting, lock down multiple of the same light source item on the same tile, in the same z axis, and the intensity of the light is increased. The difference is subtle at first, but you can build it up all the way to a solid circle of light with no feathering round the edge, if you really like (useful for say, making a spotlight on a stage)

Display cases

<font color=blue>Sarsmi:</font color=blue>

The monster statuettes are hard to display, without just tossing them around. I've actually been meaning to figure this out for a while, since I collect stuff I need to figure out how to display, anyways I just made some cases out of an east facing goza matt, some black cloth, and some stacks of silver coins:


This is an illusory display case so for the final product it requires a black staff for the 2 tile case and 2 black staffs for the 3 tile - which poke out a little on the east end but by now I don't care as I'm tired of messing with it. It's also somewhat limiting since you have to use this floor type at least for the area around the cases.

With "lids", this only has the box made from the floor tiles at the base:


Full, with black staffs raised up in front of the statues:


Directions for which tiles go where:


Multi-tiered:


Vendor or costume displays:


Area rugs

<font color=blue>Sarsmi:</font color=blue>

I made area rugs! I think I like them. We'll see tomorrow. There's definitely potential with the 'fringe' floor tile.


Sunflower

<font color=blue>Hazard:</font color=blue>

I saw a sunflower in my travels that you might like (as for recreating, I didn't toggle the individual pieces so you'll have to guess if interested).


Guildstones

<font color=blue>FFBooks Again:</font color=blue>

Guildstones now are just like any other house add-on (except that ones can't be created of course).

If you axe the guildstone it will turn into a deed, and 'remember' the guild information attached to it, so that when replaced it keeps the same information it used to.

Basically a form of rare deco, which holds a lot of strong nostalgia feelings with the original owners/guildmasters.

A new bird

<font color=blue>Jarno:</font color=blue>

I was decorating today and noticed this little possibility by accident. A new bird perhaps?


It's made of a Diseased Bark and Tainted Seeds.

Tainted Seeds come as loot from Tangle, the red bog thing mini-boss in Blighted Grove. The Diseased Bark if one of the new rare crafting ingrediends that Lady Melisande, the peerless boss in Blighted Grove, drops.

Scarecrow

<font color=blue>Sarsmi:</font color=blue>

I don't know about kickass, but it's pretty easy to do...

parrot perch
tall straw hat
squash
dyed leather do

I zoomed in so it's easier to see how high to raise stuff:


Rune Map

<font color=blue>solace1369:</font color=blue>

Here is a picture of the roof of my house.
This mini map has active runes and soon to be books for the cities dungeons and shrines of tramel and fel. Public house. Location in rune book.


Housing Tile Fireplaces

<font color=blue>Desperado SE:</font color=blue>

http://users.lmi.net/~noodle/netathene/info/HouseDecDesign/Fireplaces.jpg

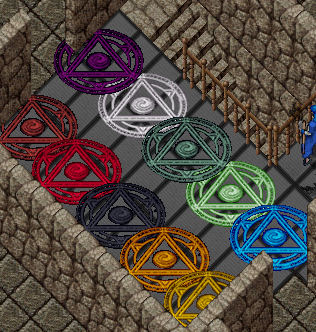
Marble and Obsidian Plinth

<font color=blue>Tanis (Europa):</font color=blue>

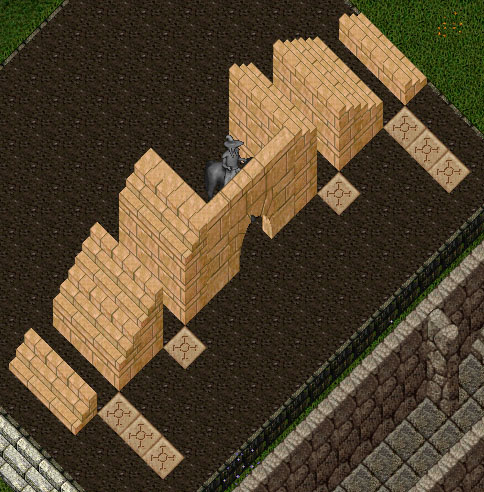
You can walk up onto it from any direction, and you can even still use it as an arcane circle! Voila, one marble and obsidian plinth.

Just for ref for anyone else who wants to do this or similar:

- Place the arcane circle
- Lock down each piece as per image in an above post (Thanks again Sarsmi)
- Enter customisation mode
- Place stairs as per page linked in an above post (I had trouble getting it to work when I did the sides in any old order, WNSE worked every time though)
- Raise each piece of arcane circle 6 steps
- Place all 9 goza mats by targeting the relevent square through the circle (A bit tricky, especially when they're black )
- Raise each goza mat 5 steps


Stacking runebooks for a rune library

<font color=blue>Desperado SE:</font color=blue>

This is a picture of some ideas that Sarsmi came up with for displaying your books from a thread I posted early last year that might help you out with setting up your place.


As to the pics of my library, here ya go...
I used a combination of the two methods I outlined in my first post (was going to use one of Sarsmi's ideas, but I don't have enough lockdowns available anymore ). This is the first floor, mainly cities and Tokuno and Malas locations.


Second floor is my mining and resources. The two empty shelves on the west side are for a wood set once I get around to completing it.


Third floor has the treasure hunting book, lockpicking training, and regular monster hunting books.


And on the roof are the quests, rares and training books among others that just didn't really fit into the other catagories. I also designed a recall rune into the floor tiles on the roof for people to locate us easily in thier radars.


As to the lockpicking training house, I only used benches there since I had more available lockdowns over there. So what I did was built the second floor around the books...


<font color=blue>jcesare:</font color=blue>

Personally, I like east facing libraries better. Plain books look like draws with handles. Here is my library:


<font color=blue>Xanth De Orlig:</font color=blue>

Here's a couple ideas fer ya ;-)

First shot is of my personal rune library, located in Avalon, Baja, still growing, and will probably end up expanding eventually, to a larger room Each set of colored books is a different 'of Baja' set. Black books are 'Dungeons of Baja', Gold- 'Banks of Baja', Blue- 'Moongates of Baja', Agapite- 'Mage Shops of Baja', silver- 'Shrines of Baja'. All sets are alphabetical and encompass all facets from Felucca to the Tokuno Isles.


This next pic is from the Avalon Rune Library, owned by Hazard. The first floor is open, which is Felucca runes; 'bout anywhere you would want to go
The books are housed in wooden shelves, with a rune on top of each telling what is in that shelf. Shelves are set to the public but locked down, as are the books, so anyone can access them. One of the oldest on Baja fer sure, Est. 1998, and with a staggering 56,570 visitors.


Curtains

<font color=blue>Sarsmi:</font color=blue>

Using the different cloth bolts you can buy from tailors and weavers, you can make your own drawn curtains to seperate rooms:


Using plates and barrels to make granite storage containers

<font color=blue>Sarsmi:</font color=blue>

Tinker up different colored plates to be raised on top of full or empty barrels for colorful granite storage!


Chipmunks

<font color=blue>Sarsmi:</font color=blue>

Made out of wool, a ball of yarn, a gold coin, sandals, a fancy shirt, and other items:


Turkey

<font color=blue>Sarsmi:</font color=blue>

2 Bola balls, one raised one level higher than the other (the bottom one is dyed grey to be the plate), and then two lamb legs:


Decorating with monster statues

<font color=blue>MissEcho</font color=blue>

Because they are all dif shapes sizes and colors you either have to just make em into a feature or scatter them around your house. I made a hall of statues in my castle to display them on goza mats raised to allow 2 statues per tile.

http://members.westnet.com.au/hjs_echo/pics/statuehall.jpg

In my previous two houses I put an actual art gallery style arrangement to display stuff. This is a pic of one of them.

http://members.westnet.com.au/hjs_echo/pics/gallery.jpg


Ankh Table

<font color=blue>Terrance</font color=blue>

I'm still decorating this as I go, but wanted to share it so far:

http://www.duaxmachine.com/alexander/TABLE_02.jpg

My ankh table, complete with a seat kept in honor of the King, snowy scenes of his shrines of Virtue, and small details as I add them. The rune with the blood underneath is obviously Sacrifice, and the rose on the other side of the snowglobe is "A Whispering Rose From Julia", the Companion representative of Sacrifice, so you can see the themes I'm trying for. Not the I think I'll luck into anymore roses named for Companions but it was a nice touch.

I'm trying to decide whether to put food on the table or not. *sighs*

Making Grape Vines

<font color=blue>MissEcho</font color=blue>

This pic shows how I did them for my wild west theme, on the roof of my shop in luna. I leave the roof free and just practice deco up there when the urge takes me lol

These vines are simple with two pocket dip (sth) 4 gnarled staffs, some vines and grape bunches. If you do it using east pocket dips you need to get staffs as loot (of monsters) to face the right way or use something else, logs would work.

http://members.westnet.com.au/hjs_echo/pics/westerntheme.jpg

I have also done a pergola with staffs going in both directions in a number of houses. This pic is not one of mine (couldnt find a screenie), but shows basically the idea. This uses nightshade and grapes as the vines.

http://members.westnet.com.au/hjs_echo/pics/pergola2.jpg

Pool Tables

<font color=blue>Raven Bloodlust</font color=blue>

http://uo.stratics.com/homes/famous/houses/images/sphyrthird.jpg


<font color=blue>Sarsmi</font color=blue>

It looks like four large tables, dyed green, set together with some stringless yarn balls you can get from the NPC weaver, along with a black staff from the NPC smith and a glacial staff. Oh, and some beeswax from the provisioner


<font color=blue>Kurgan</font color=blue>

Here is one I did years ago...

http://uo.stratics.com/homes/famous/houses/images/chrisVillaBtmFlr.jpg

6 bench's
15 green cloths
several colored gems
Black Staff
Lanterns Shadow Colored Buclkers.


<font color=blue>Sarsmi</font color=blue>

I forgot I did a pool table on siege quite a while back. Not particularly impressive. I did bumpers/rails out of black cloth and used anvils to make the feet. I'd do it a lot different nowadays. One thing that is impressive, you can't buy yarn on siege - I found the stringless yarnballs at an idoc from a period in time when you could actually buy yarn from NPCs. I still have about 20 of them, somewhere. Largish uncropped pic:

http://forbidden.dough.net/~sarah/VixenSiege2ndfloorinside2.jpg


<font color=blue>Voluptuous</font color=blue>

I used to do em years ago...fairly simple.

http://sothebys.jon2s.com/pluffy/howto.html


Easter Bunny

<font color=blue>Sarsmi</font color=blue>

http://forbidden.dough.net/~sarah/Bunnies.jpg
http://forbidden.dough.net/~sarah/SideBunny.jpg

(For the first one)
You need:

1 tricorn hat
1 wide brim hat
1 skull cap
1 black pearl
four piles of wool
2 stringless yarn balls
jin baori
waraji and tabi
2 spider silk


For the white bunny you will need the ultra white wool (dread spider silk), make everything out of ultra white cloth except the jin baori (made from regular white tailor reward cloth), and possibly the wide brim hat (can also be made from the tailor bod reward white cloth).

For the brown bunny, make the waraji and tabi out of dark brown cloth. Dye the jin baori, the four wool stack, the skullcap, and tricorn hat all light brown. Dye the wide brim hat dark brown so that it matches the hue of the other items.

Dye the double stack of yarn balls pink or red, this is to make the bow tie.

Stack and lock down in this order:
waraji and tabi
double stack of wool
jin baori
single stack of wool
2 red or pink dyed yarn balls
single pile of wool
black pearl
skullcap
tricorn hat

On the tile to the north of the one you're working on, lock down the wide brim hat. On the tile east of the bunny stack one spider silk on top of the other and lock them both down.

raise tricorn hat all the way up (7)
raise wide brim 6
raise skullcap 5
raise black pearl 5
raise top wool 4
raise 2 stack yarn balls 2
raise next wool 2
raise jin baori 2
raise double wool stack 1
raise waraji and tabi 1
raise top spider silk 8
raise bottom spider silk 8

The basket next to the brown bunny is from the spring decor collection. You can also use an empty basket and parasitic plants with colored eggs on top and maybe throw some carrots in for good measure.

*Note: you can also use a stringless yarn ball to make a less fluffy tail, in place of the spider silk

(For the second one)

Lets see...

2 body sashes made from pure white cloth
2 barbed leaf gorgets (they cover the holes in the sashes), dyed luna white
tourmaline
5 dread spider silk
purple kasa
purple flower garland
barbed leather suneate, dyed luna white
tattsuke-hakama made from pure white cloth

On the main bunny tile:
stack and lock down tattsuke-hakama, single dread spider silk, double dread spider silk, suneate, single dread spider silk, kasa, single dread spider silk, barbed leaf gorget, body sash, and tourmaline.

One tile to the south of the main tile:
stack and lock down barbed leaf gorget, body sash

One tile to the east of the main tile:
stack purple flower garland

Raise everything so it looks like the picture. Might want to raise the body sash, leaf gorget, and tourmaline on the main tile first as they can hide behind other things pretty easy.


Craftable Containers

<font color=blue>AthenePac</font color=blue>

If your decorating a house and can't remember what chest or elf container you saw and liked and want all the containers in a quick and easy place to see I made this.

http://users.lmi.net/~noodle/netathene/info/CraftCont/


Hiding a chimney/hearth of homefire chimney

<font color=blue>Desperado SE</font color=blue>

Can't say for sure, since Id on't own one of those yet...but if I remember correctly, the chimney doesn't go up through the floor above with the hearths. But if it does, you can do the three tiles in thing you mentioned. And actually, you can do alot of great things with a design like that. I use something simillar in my house to give my library a built-in bookcase look. Plus there's a post a little ways down of a guy on Catskills that set his walls up to make a recessed storage area where he hass his chests sitting at. Looked really good.


<font color=blue>DevilsOwn</font color=blue>

yep, they do poke thru

In one house I had ample room, and it was a custom, so I just built a roof over that area and one carefully placed opening for the chimney to poke thru (pretty sure it was one... may have been two) and that looked okay, but as with all things UO it was just a smidge off

At the castle it pokes thru the ceiling onto the middle roof, and as we all know, until Sarsmi figures out that goza trick without a misuse of abilities I can't decorate up there to cover it with plants, which works fairly well in most cases.

If you're not a flowers-type person I remember reading one time that someone had deco'd the chimney to look like a wishing well.

But yeah, best way to go is to just move the walls in a bit.


<font color=blue>Wynne</font color=blue>

As DevilsOwn says, disguise with flowers, it does make a nice looking wishing well. You can also place an elven washbasin over the chimney that pokes through, and a tiny bit of the chimney will be visible underneath the washbasin. You could also create a walled enclosure hiding the chimney and then hang pictures on those walls. Or you could enclose the chimney with walls that make it look like a mantel, and have the chimney bits poking up look like bricks in a fireplace.

Before disguising:

http://img518.imageshack.us/img518/9602/hearth000213vf.jpg

After disguising: (be sure you lock down the Heart of The HomeFire before you go into customize mode so you can see where it is when you customize. It's much better than hit and miss customizing.)

http://img518.imageshack.us/img518/2453/hearth000115in.jpg


Weapons Rack

<font color=blue>Desperado SE</font color=blue>

Here's the weapons rack I made for my smithy area in my old house. Not the greatest or anything, but I like the simple designs personally.

http://i16.photobucket.com/albums/b19/Desperado_SE/weaponrack.jpg
 
G

Guest

Guest
<font color=red>CUT-UP STAIRS</font color=red>

Half Stairs

<font color=blue>Kurgan:</font color=blue>

This is where I got my info..

http://member.newsguy.com/~heinrich/staircases.html

Here is a link to the pic I took to give you folks some ideas for this new half stair thing and platform making going around.

Half stairs and platform idea:

ftp://lucky-girl.com/UOStuff/stairs1.jpg

Grand staircase Top:

ftp://lucky-girl.com/UOStuff/stairs2.jpg

Grand staircase:

ftp://lucky-girl.com/UOStuff/stairs3.jpg

Spiral stairs

<font color=blue>Tanis (Europa):</font color=blue>

Right then, finally figured out a way to get a nice, square spiral staircase in my rune library. You know those annoying sliding puzzle things? If you don't like them, don't try this at home


<font color=blue>Sarsmi:</font color=blue>

I put them next to the back wall, after changing the direction they went in.

1. The setup. The bottom stairs are placed first, one tile south of where the wall is. Then the second shortest tier of stairs is placed, and the shortest is erased to get rid of the bottom steps for the second shortest, then is remade. Etc.

2. Second floor view, rogue tile is supported by the back wall.

3. I added half walls to make it a proper stairwell. I think this ends up looking quite a bit nicer than leaving empty space under the goza mats.

4. With goza mats and flowers. Note, the half wall that matches the third tallest stair block is a little too tall and will block you from walking on unless you raise the goza mat high enough, which will leave a little space under the mat. To compensate for this I put another goza mat of that ultra white color (might as well use that cloth up for something) underneath and you can't even tell its there.


<font color=blue>Kurgan:</font color=blue>


<font color=blue>Sarsmi:</font color=blue>

To build against the back wall on the west side you have to allow for 2 free tiles of space. For the east side you *can* build right up to the edge of the east side of the plot, but you can't get on the stairs this way or build a wall. You can swap the direction the lowest steps are coming from so that you can get on the stairs, but there is still the wall issue.


In order to be able to get on the steps and walk past any wall you need to allow at least 2 free tiles of space from the east side.


Keep in mind that the first level of the stairs cannot be deleted by placing a teleporter underneath it, it must be deleted by removing any other stairs that have been built that fall in it's path. So you have to build the stairs to remove those parts of the stairs before you build the actual stairs that you want.

Building a spiral staircase on the north-west side:

1. Yellow = lowest tier, tier 1
brown = second lowest tier, tier 2
blue = third lowest tier, tier 3
red = highest tier, tier 4
Place three teleporters south of tier 1.
2. Place a south facing staircase on top of the yellow tile and all the teleporter pads.
3. Click twice on the transparency level for that floor to make the staircase transparent and erase the teleporters. Click the floor level you are on.
4. Place 2 teleporter pads to the west of the brown tile.
5. Place a west facing staircase so that it's first tier is south of the first tier of the stairs to be built.
6. Click twice on the transparency level and delete the 2 teleporters. Click the floor level you are on.
7. Erase the northern tier 1, this will also remove the southern tier 1.
8. Place three teleporter pads in a southern row to the east of the tier 2 stairs.
9. Place a south facing staircase so that it covers the teleporter pads except for its first tier.
10. Click twice on the transparency level and delete the 3 teleporters. Click the floor level you are on.
11. Place teleporter pads 1 north and 2 south of the blue tile, then 2 to the east of the southernmost tile.
12. Place a staircase so that all the southern tiles are covered, and the first tier of the staircase is not over a teleporter.
13. Click twice on the transparency level and delete the 3 teleporters that this new staircase is covering. Click the floor level you are on.
14. Place a staircase so that it covers the 2 remaining teleporter pads and the blue tile, leaving its first tier not over a teleporter.
15. Click twice on the transparency level and delete the 2 teleporters that this new staircase is covering. Click the floor level you are on.
16. Delete the southeasternmost tier 1 staircase in order to remove the westernmost tier 1.
17. Click twice on the transparency level and place the five teleporters in the corner to the west of the red tile and south. Click the floor level you are on.
18. Place a staircase so that it covers the three westernmost teleporter pads, except with it's tier one.
19. Click twice on the transparency level and delete the three teleporters this new set of stairs is covering. Click the floor level you are on.
20. Place a east facing set of stairs so that the two teleporter pads and the red tile are covered by stairs, and the tier 1 of this set of stairs is not covering any teleporters.
21. Click twice on the transparency level and delete the two teleporters this new set of stairs is covering. Click the floor level you are on.
22. Erase the southwesternmost tier 1 in order to get rid of the northwesternmost tier 1.
23. Place the shortest walls next to tier 1 and 2, the medium height walls in between tier 2 and 3, and the tallest walls next to tier 3 and 4.
24. It can also be made into a corner. Remember when you put the goza mat down between tier 2 and 3 it will need to be raised high enough to allow you to walk on it, which will leave a gap. Placing an additional goza mat that is one level (in the housing tool) lower than the first mat will cover this gap.

http://forbidden.dough.net/~sarah/spiralguide.jpg

More fun with cut-up staircases

<font color=blue>Hemisphere:</font color=blue>

I've just been playing around with this cut up staircase thingy to find more deco possibilities, I'll post a few I've made, hopefully we can work together to find some more unique and interesting ideas (like the spiral staircase!)

Display cases/shelvey things.


Water feature in the top right, and a bridge there in the bottom left, sans gozas.. but you get the idea


More random twiddling. God knows why EA didn't let us use stairs in this way in the first place really.


Crazy stairs for the eccentrics among us, yea you can actually walk up and down these, even though it doesn't look like it. Your character bumps suitably as he walks up and down.


Stairs? What stairs? Again, these can be walked up just like regular stairs, but double up as a nifty display area.


Swiftly done hot tub


<font color=blue>Kurgan:</font color=blue>

Make the hot tub with the water tiles you can walk over, or waves. Then find some way, maybe benches dyed to match the water color. So that when you walk over them it will sit you down. To finish off the illusion.

Using stairs as walls

<font color=blue>Sarsmi:</font color=blue>

Use the flat side of stairs as half walls for bridge structures and the like:


I built a bridge with sandstone and used the stair facings to make the 'walls' that join one level of stairs to another. Not bad looking!


Ok this is what you start out with once you've placed all your stairs:


The only actual wall tiles you need are the ones placed inside the stairs against the south stairs and then some walls facing east:


Now place some teleporter pads in the position shown. If you aren't doing an exact copy then place the number of pads according to the simple formula of 4 minus the level of the space the pads are next to. For example, there are three pads placed southernmost, that is because they are next to the bottom tier of stairs (four minus one):


Now place stairs on top of the pads so that the top most tier of the east facing stairs is on top of the teleporter that is furthest east - you're going to be getting rid of all the stairs that 'stick out':


Now erase the teleporter pads, and wah-lah, you have walls at the perfect height that are actually made up of stair parts:


Mid-way levels in houses

<font color=blue>Zynia</font color=blue>

A friend has asked if it was possible to make another level to your house, using the new stair thing and goza mats, so I spent 4 1/2 hours tonight fiddling with it, but this is the only way I could get it to work. The cons far outway the pros.. But if you didn't need the goza mats it would be soooo cool lol.

http://www.uoforums.com/imagehosting/2475445c201c77599.jpg

This is how it would look like.. You need the gozas there to make the floor level even with the stair level, although decorating on top of the raised "floor" you've made I haven't tested yet.. The two extra arches are holding up the floor above it, since they couldn't be connected.

http://www.uoforums.com/imagehosting/2475445c223247806.JPG

This is where you would enter the house, since the mats are raised four times you'd need another few sets of the single stairs to get ya up there, otherwise.. Teleporters.

Here are the CONS of having a "sunken" room. (I didn't test a raised one, although I got the inspiration from Kimmy's design on her thread on UOForums.)

http://www.uoforums.com/imagehosting/2475445c20270e48c.jpg

Con #1: Since the floor is raised four levels with the house tool, you would not be able to access the telporters. You'd be able to go up, but not come down. So, I made "stairs" with different levels of the gozas, and placed more underneath, so you wouldn't see the wood floor through the raised "stairs." (I hope you're understand this, because I'm two seconds away from confusing myself!)

http://www.uoforums.com/imagehosting/2475445c202d588cf.jpg

Con #2: This is the view while standing on the stairs in the "sunken" room. You're able to see the floor above you, because as we all know, you can't place floors over any four tiles of a staircase. Which leads to our next on the list..

http://www.uoforums.com/imagehosting/2475445c2033c6369.jpg

Con #3: This is the view of the room ABOVE your "sunken" room. You're able to see two rows of where you couldn't place the tiles. I played around with normal goza's seeing if I could place them on a different tile to overlap the empty space, but it wouldn't let me. So the conclusion I came up with was to just put walls to overlap where the holes are. (I'm using circle transparency in most of the pictures if you didn't notice lol.)

WARNING: EVERYTIME YOU CUSTOMIZE YOUR HOUSE AFTER THE GOZA'S THAT YOU HAVE ALREADY RAISED WILL BE MOVED INTO YOUR MOVING CRATE! (I learned this the hard way, having to raise ALL the mats four levels FIVE times. The best way to pass the time is to click with your tool in rows and hum your favorite song.. lol!)

.. Not the best, but it IS possible!

-Zy

Special thanks goes to Kimmy at UOForums.com for the inspiration on spending 4 1/2 hours maybe trying to get this to work. And my new hatred towards goza mats! Thanks


Cut up halfway stairs with platforms

<font color=blue>Sarsmi</font color=blue>

I just did some up on test center. Let me know if you like any of these and I'll give you instructions. You can make the platform any length as long as it is at least 2 tiles long (so that you can fit in the rest of the staircases that you end up erasing). Also, you can't put a floor above any of the staircase part including the platform. So if you want a really big platform keep in mind that the floor above is going to be missing floor tiles in order to accomodate the platform below.

I liked #2 for the storage/stuff potential. I think theres a lot of ideas there...anyways:

http://forbidden.dough.net/~sarah/GFGoza1.jpg

...I redid the third one so it has a center post you can put stuff on. Not a big variety of things to use on test center, but maybe flowers or a light source or something on a normal shard:

http://forbidden.dough.net/~sarah/GFGoza2.jpg
 
G

Guest

Guest
<font color=red>GOZAS</font color=red>

Raising goza mats

<font color=blue>Sarsmi:</font color=blue>

You can raise the single goza mats with the home dec tool.

A. Walk on the gozas that are raised, like stairs
B. Raise them to create illusory sunken areas like pools
C. Make perches for flowers and other items
D. Add tables and lamps for an unusual light source
E. Use them to make shelves


Goza mat tricks

Keeping gozas from redeeding when customizing

<font color=blue>Deception:</font color=blue>

Sarsmi, I figured something out that I think you might be interested in. If you lock down each goza before re-entering customization mode, they'll stay where they are and not need to be raised again when you're done. I figured this out after having to re raise about 50-75 gozas 5 or 6 times....

Placing gozas

<font color=blue>Sarsmi:</font color=blue>

I learned a neat trick, if you double click the goza mat and target yourself, it will drop down onto the tile that you are standing on.

Creativity with goza mats

<font color=blue>Sarsmi:</font color=blue>

A rainbow pattern I saw on Europa:

 
G

Guest

Guest
Hello All....I am trying to find a site that tells how to make the car. I seen it on someones roof. I love it
. Looks so damn cool .
If anyone knows where I can go to learn how to make it...Please Let me know. Thank you very much. Btw Love the tips on decorating.
 

Morgana Grim

Lore Master
Stratics Veteran
Stratics Legend
UNLEASHED
if you could go back to where you saw it and take a screen shot perhaps someone could figure it out if there is no site to make it.
 
V

vivathia_TcV

Guest
<blockquote><hr>

Hello All....I am trying to find a site that tells how to make the car. I seen it on someones roof. I love it
. Looks so damn cool .
If anyone knows where I can go to learn how to make it...Please Let me know. Thank you very much. Btw Love the tips on decorating.


[/ QUOTE ]

I found a site with a car, I soooooo love this car too, I attempted to make it and failed miserably, So I'm posting the link to get all you deco Pro's brains rattling and in hope that someone can pull it to bits and put it back together again.

Car's in UO
 
G

Guest

Guest
Well I spent quite a bit of time on this, I got close but my car is shorter and I added a front wheel to compensate for that visually.

The back row is A, then the next is B, then C, then D. The columns are numbered from left to right. The type of cloth needed is purchased from weavers (type 1-4), made with the combine cloth feature or bought from tailors (type 6), and from cut up bolts (type 5). I have numbered the different types of cloth used.

A double stack of cloth is two cloth in the same pile. Drop the items listed in the directions in the order that they are presented. It will indicate if the item is to be raised or lowered, otherwise leave as is and lock down.

Materials needed:
2 Cauldrons
1 smooth grey-dyed bag ball (not the bumpy kind)
3 blow pipes (purchase at gargoyle city from NPC alchemists)
1 black staff (purchase from an NPC blacksmith)
rolling pin (made by tinkers)
2 magincia thrones
2 body sash
dull copper ingot (optional)
mondain's coin (optional)

Cloth:
type 1: 19 pieces
type 2: 18 pieces
type 3: 5 pieces
type 4: 2 pieces
type 5: 56 pieces
type 6: 4 pieces


A1 - stack and lock down: double stacks of (5) x 7, a single stack of (1)
A2 - stack and lock down: double stacks of (5) x 7
A3 - lock down cauldron, stack and lock down: a single stack of (3), and a double stack of (1)

B1 - stack and lock down: a chair, a body sash raise 7, a pipe, a pipe, a pipe, the staff, raise staff 1, raise highest pipe 1, raise second highest pipe 1, raise bottom pipe 1
B2 - stack and lock down: a chair, a body sash raise 7, a rolling pin raise 4, a double stack (5) lower all the way
B3 - stack and lock down: a double stack (3) raise 6, a single stack of (1)

C1 - stack and lock down: double stacks of (5) x 6, a double stack of (6)
C2 - stack and lock down: double stacks of (5) x 6, a double stack of (6)
C3 - stack and lock down: a double stack of (3) and raise 6, a single stack of (1)

D1 - stack and lock down: a double stack of (4) raise 9, a double stack of (2) raise 9, a single stack of (2) raise 8 (yellow), a single stack of (2) raise 7(yellow), a single stack of (1) raise 5, a double stack of (2) raise 4, a double stack of (2) raise 3


D2 - stack and lock down: a double stack of (1) raise 9, a double stack of (2) raise 9, a single stack of (1) raise 8 (grey), a single stack of (1) raise 7, a single stack of (1) raise 6 (grey), a single stack of (2) raise 8 (grey), a single stack of (2) raise 7, a single stack of (2) raise 6 (grey), a double stack of (1) raise 4, a double stack of (2) raise 4, a double stack of (5) raise 4

D3 - stack and lock down: a double stack of (1) raise 9, a double stack of (2) raise 9, a single stack of (1) raise 8 (yellow), a single stack of (1) raise 7 (yellow), a double stack of (1) raise 5, a cauldron, a single stack of (2), raise cauldron by (1)

go back to D1 and place a smooth, grey-dyed bagball, and raise by 3, raise cauldron (on D3 tile) by 1

Dye all cloth stacks black except where indicated.

(optional): place and lock down a single dull copper ingot to the tile east of C3 and raise it all the way up
(optional): place and lock down a mondain's coin on D2, raise till it looks good.
 
G

Guest

Guest
<blockquote><hr>

I need some guides on how to make water fountains...you know the larger "three-tiered" ones, not the skinny single flow ones....anyone have any idea what i'm talking about?

[/ QUOTE ]

Over a year later, but here are Pluffy's instructions for Autumn Starr's big fluffy multi-tier fountain...I made one a couple of days ago
. Thanks to the person who hosted the instructions, and of course the ones who made them in the first place!

-Skylark
 
G

Guest

Guest
I thought some may like to see what the abbatoir carpentry add-on looks like when made from the various new woods released with Mondain's Legacy...without having to make them just to see. You can make these a nice part of a deco theme. They are pictured in order of the wood rarity, in the top row from left to right is oak, ash, and yew, and the bottom row from left to right is heartwood, bloodwood, and frostwood. I didn't include a pic of the grayish stone colored slab made from regular wood as I figure everyone knows what that looks like. Also pictured here is a square goze mat made from the dread spider "quest cloth" that was Hat of Magi white, which can no longer be produced.


-Skylark
 
G

Guest

Guest
<font color=red>CUSTOMIZING TIPS</font color=red>


Placing a Roof

<font color=blue>Sarsmi</font color=blue>

Ok here we go, I did a multi-colored roof using the ceramic tiles and made a chart of what each tile was. If you turn tool tips on (Options menu, pop-up help, use tool tips, hit apply and ok) then when you mouse over the roof tiles it will tell you what kind of tile it is.

http://forbidden.dough.net/~sarah/roofie1.jpg

http://forbidden.dough.net/~sarah/roofie2.jpg


Optical Illusion Towers

<font color=blue>Xanth de Orlig</font color=blue>

Quick Tutorial on Tower Illusion

- The different floor tiles represent where each new 'floor' will start.

- First make your corner, for this example i am doing a four tile wall on each side.

http://img.photobucket.com/albums/v318/lateral/Houses/one.jpg
http://img.photobucket.com/albums/v318/lateral/Houses/two.jpg

- The Second floor wall starts on the lighter grey set of tiles, in reality making a narrow hallway, but giving the illusion of sitting on top of the far SE corner.

http://img.photobucket.com/albums/v318/lateral/Houses/three.jpg

- To smooth the edges, try extending the original wall with a pillar type tile on each end, and adding an extra wall tile to the second floor walls.

http://img.photobucket.com/albums/v318/lateral/Houses/four.jpg

- Add some windows and it really starts to look like two seperate floors.

http://img.photobucket.com/albums/v318/lateral/Houses/five.jpg

- Keep extending the tower higher, adding more floors in the same fashion.
- On the third floor i switched back to the single pillar tile at the ends, but one tile shorter to keep the edge of the tower going. Then on the fourth just shortening the wall's edges one tile.

http://img.photobucket.com/albums/v318/lateral/Houses/six.jpg
http://img.photobucket.com/albums/v318/lateral/Houses/seven.jpg

- A Spire Roof would be done the same way, by placing the appropriate tiles behind the walls the same distance. Then placing the final spire piece to fit snugly 'atop'.

http://img.photobucket.com/albums/v318/lateral/Houses/eight.jpg
http://img.photobucket.com/albums/v318/lateral/Houses/nine.jpg

- And you are left with a four story tower on the first floor ;-) This is just a basic form, you can tweak all the tiles and really give it a look of your own ;-)

http://img.photobucket.com/albums/v318/lateral/Houses/ten-finished.jpg

<font color=blue>MissEcho</font color=blue>

http://members.westnet.com.au/hjs_echo/FE/HH/hh4.jpg


More House Illusions

<font color=blue>Tanis (Europa)</font color=blue>

I'm a tad obsessed with illusions myself...

http://ultimacentral.com/images/cove_lighthouse.jpg
http://ultimacentral.com/images/luna_illusion1.jpg
http://ultimacentral.com/images/magestower.jpg


Big Cave, no housing tiles used

<font color=blue>Sarsmi</font color=blue>

A feat of engineering! Ok, maybe not quite a 'feat', but a fun challenge anyways. It was built using goza mats, wooden boxes, dull copper ore and granite - and it doesn't use any of the custom wall or floor tiles at all.

It came out a lil different than I envisioned, but I had to do the whole thing in layers without being able to see what it would look like untill I did the final customize removing all the floors and walls.


http://forbidden.dough.net/~sarah/Cave1.jpg
http://forbidden.dough.net/~sarah/Cave2.jpg
http://forbidden.dough.net/~sarah/Cave3.jpg
http://forbidden.dough.net/~sarah/Cave4.jpg

Floorplan of the path I made in photoshop (in case anyone is curious). The numbers represent the height of the gozas and the R stands for the rock:

http://forbidden.dough.net/~sarah/Cave5.jpg


Friggen Black Citadel - example of using granite for walls

<font color=blue>Gheed</font color=blue>

How can I be a friggin Evil Necro if I don't have a friggin Black Citadel?

http://i79.photobucket.com/albums/j155/billder/blackCitadel.jpg

With a friggin evil scribe and alchemist's room.

http://i79.photobucket.com/albums/j155/billder/1stfloor.jpg

With a friggin evil altar room to worship my friggin evil gods.

http://i79.photobucket.com/albums/j155/billder/2ndfloor.jpg

lol ok I havent finished decorating yet but this took me some time to put together. I also only have 38 lockdowns left with the ML expansion.

UO no give me black stone walls...I say phooey on you UO, I make my own black stone walls!


Combining Houses

<font color=blue>Big Taco</font color=blue>

I have 2 houes next to each other and want them to look like one. Can someone help me please? I've included a pic of them for size and orintation purposes

http://geocities.com/mruopro/houses.jpg

Well, I combined em, sort of. I made a big park/treehouse sort of thingy for Mondain's Legacy and elves. I really want it too look as if you can walk from one to the other but I don't think I quite pulled it off and any suggestions would be greatly appreacated. Here are some pics of what I got so far.

http://www.geocities.com/powerauthority69/house.jpg
http://www.geocities.com/powerauthority69/house0.jpg
http://www.geocities.com/powerauthority69/house1.jpg
http://www.geocities.com/powerauthority69/house2.jpg
http://www.geocities.com/powerauthority69/house3.jpg
http://www.geocities.com/powerauthority69/house4.jpg
http://www.geocities.com/powerauthority69/house5.jpg


Greenhouse Designs

<font color=blue>Sarsmi</font color=blue>

It's not the same size as your house but it might give you ideas. I put down some grass for individual pots in the middle, and as you can see I experimented with stacking plants on top of rarewood chests (dyed dark so they would stand out). I only did 9 plants, the other 8 would go on the west wall along with a column of storage chests for potion kegs, mutants, and whatnot.

I didn't feel like moving the chests I had there - I also am going to store plants according to their color, so I can just hue the chest they are in red or bright red or whatever, then put three bags in each chest and put the plants in this order:

http://forbidden.dough.net/~sarah/PlantOrder.jpg

This is for my seed-holding plants.

Which might be something you would want to consider doing if you don't like how it looks with plants stacked on the chests.

http://forbidden.dough.net/~sarah/GreenH1.jpg
http://forbidden.dough.net/~sarah/GreenH2.jpg
http://forbidden.dough.net/~sarah/GreenH3.jpg
http://forbidden.dough.net/~sarah/GreenH4.jpg

http://forbidden.dough.net/~sarah/GreenH5.jpg


<font color=blue>Melina Havelock</font color=blue>

This is the greenhouse.

http://i2.photobucket.com/albums/y18/MelinaH/UO/HavelocksFloralShoppe1.jpg
http://i2.photobucket.com/albums/y18/MelinaH/UO/HavelocksFloralShoppe2.jpg


<font color=blue>Wynne</font color=blue>

Well thanks to Sarsmi for the footprint, and Melina for the window idea, here is the preliminary greenhouse plan. I actually liked the plan for just a regular house. Unfortunately the house is one tile too short to make the roof perfectly acceptable, so I disguised it with tiles of similar color to the wall material.
Thank you!

http://img76.imageshack.us/img76/3792/uogreenhouse00059kq.jpg
http://img256.imageshack.us/img256/8457/uogreenhouse00043ux.jpg
http://img76.imageshack.us/img76/6269/uogreenhouse00034wd.jpg
http://img76.imageshack.us/img76/213/uogreenhouse00028jm.jpg
http://img199.imageshack.us/img199/6136/uogreenhouse00011kr.jpg


<font color=blue>pixielove</font color=blue>

*tagging to last*

Using Sarsmi's original footprint I came up with instead of a roof, "glass roof solar panal" (yeah I know its goofy lookin but I just had to do something)

http://thumpsnarf.com/house/uo0006.jpg

The tile positions are 1/2 1/2 1/2 1/2 1/2


<font color=blue>Melina Havelock</font color=blue>

Okay I decided to try the solar look on my greenhouses. Unfortunately my image is rather small but I think the point is there. I even took out a couple panels to make it seem as if the glass is broken.

http://i2.photobucket.com/albums/y18/MelinaH/UO/HangingGardensLuna4.jpg


Locking down items to stay visible in customize mode

<font color=blue>Wynne</font color=blue>

Also, when you are placing statues (deedable) if you lock them down they usually stay visible in customizing mode so that you can see what they look like as you design around them.
 
G

Guest

Guest
Here are pics of the arcane circles, dyed with each of the available Pigments of Tokuno.

Note: the circle MUST be made with a colored wood (i.e. oak, ash, yew, heartwood, bloodwood or frostwood) to be considered a "magical" item that can be dyed with the pigments, and you MUST use the dye on the "fresh" deed. Once the deed has been used, even if re-deeded you can't dye it.

Top row (left to right)
Violet Courage Purple
Luna Lance White
Nox Ranger’s Crossbow Green
Dryad Bow Green
Shield of Invulnerability Blue

Bottom row (left to right)
Admiral’s Hearty Rum Red
Berserker’s Maul Red
Shadow Dancer Leggings Black
Tunic of Fire Orange
Paragon Gold

The Admiral's Hearty Rum Red looks so close to the "natural" (undyed) circle graphic, it is probably a waste to use it.


These are arcane circles made with the colored woods:

Top row (left to right)
Regular wood
Oak
Ash

Bottom row (left to right)
Yew
Heartwood
Bloodwood
Frostwood


I wish we could have black dye tubs on Test Center, then I could have posted these with the greatest contrast to the background.

-Skylark
 
W

WrenSharpbeak

Guest
<blockquote><hr>

Here are pics of the arcane circles, dyed with each of the available Pigments of Tokuno.

Note: the circle MUST be made with a colored wood (i.e. oak, ash, yew, heartwood, bloodwood or frostwood) to be considered a "magical" item that can be dyed with the pigments, and you MUST use the dye on the "fresh" deed. Once the deed has been used, even if re-deeded you can't dye it.

[/ QUOTE ]

This apparently also works with other deeded furniture. The tokuno dyes look awesome on the old style beds!
 
G

Guest

Guest
<blockquote><hr>

This apparently also works with other deeded furniture. The tokuno dyes look awesome on the old style beds!


[/ QUOTE ]

They do indeed! And amazingly, only the bedspread is colored, unlike other items which are totally "saturated" with the pigment or wood color (in the case of a craftable item), and as a result look unnatural. After seeing your tip, I made a bed with a deep purple spread for my girly "purple" bedroom in one of my houses.


If you use a colored wood, you get a spread based on the color of the wood you used, which also looks very nice. The bloodwood one in particular looks velvety and rich.


-Skylark
 
A

Alynora

Guest
would anyone happen to know if the tokuno dyes work on vines? just outta curiousity...
 
I

Ivanya_Zelkova

Guest
My favorite decorating piece is using the arcanist statue as a plant holder. Raise a set of bolas to just slightly above the hand is (it will look like the statue is holding it), then raise a plant to just under the bolas. I like using water plants, but snowdrops and ferns are lovely as well. This works in either direction of the statue.

In the last design of my house I used this as the entry way to the main hall. Very elegant!
 
G

Guest

Guest
<blockquote><hr>

would anyone happen to know if the tokuno dyes work on vines? just outta curiousity...

[/ QUOTE ]

As far as I know, the dyes only work on things considered "magical" items. This includes artifacts (i.e. anything with an "artifact rarity" label as an item property), and also many items that have been player crafted or enhanced with special materials (for crafted items that come in deed form, the dye must be applied BEFORE the deed is used).

I don't think vines would fall in either category, but you will know for sure if you try it.

-Skylark
 

Larisa

Publishing Manager, Stratics Leadership
Editor
Reporter
Moderator
Professional
Editor
Stratics Veteran
Stratics Legend
Wiki Moderator
UNLEASHED
Umm....need to do a wishing well WITHOUT using any of the housing tiles


Any suggestions???
 
C

CatHat

Guest
I always enjoy houses that are on raised stone or rock foundations.

Of course its best if you have enough room to put the entry way up on a second floor via stairs - but either way it keeps the buildings exterior interesting.

Here's a recent pic of my own tiny cottage with a little of this going on after i put in the 9th age apple trees.


CatHat
 
G

Guest

Guest
I've seen wishing wells made from small forges with I think wool dyed blue and raised up to be water. Then you can stick a little bucket down, maybe raise up a black staff and then do some raised torches on either side to give it a prop for the bucket, if you're so inclined. And some silver and gold coins scattered about.
 

Larisa

Publishing Manager, Stratics Leadership
Editor
Reporter
Moderator
Professional
Editor
Stratics Veteran
Stratics Legend
Wiki Moderator
UNLEASHED
OHHHH CatHat! That's so homey! I love it! Very well done
A guy doing deco...I love it!
 
Top