
G
Guest
Guest
Screenies 101:
<font color="green">A. Capturing the image</font>
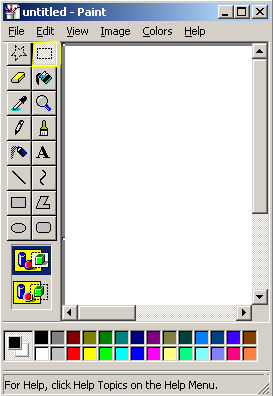
1.) First, open the built in Paint utility in Windows (Start --> Programs --> Accessories --> Paint)
2.) Next, in the UO game window, when you want to make a screenie, simply press Alt+PrintScreen. That will save the entire client area to the Windows clipboard.
3.) Switch to your paint program, click on the blank image area, and press Ctrl+V, which will paste the contents of the clipboard into Paint. You will likely get a popup, indicating that the image is larger than the default bitmap, and be asked if you want to resize it. Click Yes.
4.) Once the image is in the Paint active window, you can begin editing it. The first thing to do is crop it. There are a couple of ways to do this. The easiest in my opinion, that also gives the most control is this:
<font color="blue">B. Editing and saving the image</font>
1.) Click the Select icon on the toolbar to the left of the screen (the dashed rectangle).
2.) Click on the image and drag the rectangle border to select the area you want.
3.) Press Ctrl+X to cut the image.
4.) Click File --> New, do not save the old image when prompted
5.) Press Ctrl+V to paste your selection in the new paint window
6.) Crop out any excess white space by dragging the resize handles at the corners/edges of the image to the desired area
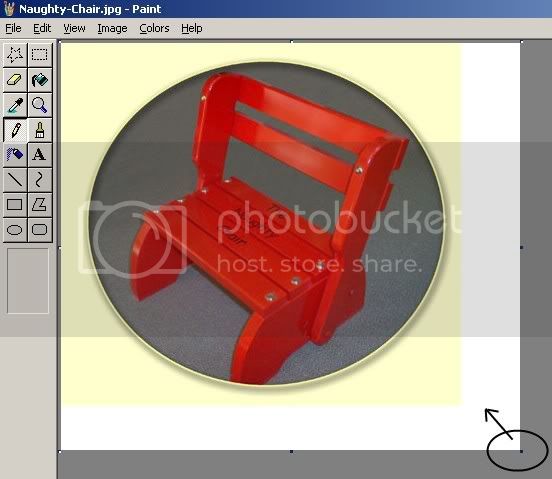
7.) Save your image as a jpg file (most compressed, while retaining highest amount of color information) by clicking File --> Save As, and then choosing JPEG in the Save as Type drop down box at the bottom
8.) Once you are done, you will need to place your image on the web to use it in posts. Some people use Photobucket (www.photobucket.com), which offers a free image hosting account with limited storage space.
-Skylark
<font color="green">A. Capturing the image</font>
1.) First, open the built in Paint utility in Windows (Start --> Programs --> Accessories --> Paint)
2.) Next, in the UO game window, when you want to make a screenie, simply press Alt+PrintScreen. That will save the entire client area to the Windows clipboard.
3.) Switch to your paint program, click on the blank image area, and press Ctrl+V, which will paste the contents of the clipboard into Paint. You will likely get a popup, indicating that the image is larger than the default bitmap, and be asked if you want to resize it. Click Yes.
4.) Once the image is in the Paint active window, you can begin editing it. The first thing to do is crop it. There are a couple of ways to do this. The easiest in my opinion, that also gives the most control is this:
<font color="blue">B. Editing and saving the image</font>
1.) Click the Select icon on the toolbar to the left of the screen (the dashed rectangle).
2.) Click on the image and drag the rectangle border to select the area you want.
3.) Press Ctrl+X to cut the image.
4.) Click File --> New, do not save the old image when prompted
5.) Press Ctrl+V to paste your selection in the new paint window
6.) Crop out any excess white space by dragging the resize handles at the corners/edges of the image to the desired area
7.) Save your image as a jpg file (most compressed, while retaining highest amount of color information) by clicking File --> Save As, and then choosing JPEG in the Save as Type drop down box at the bottom
8.) Once you are done, you will need to place your image on the web to use it in posts. Some people use Photobucket (www.photobucket.com), which offers a free image hosting account with limited storage space.
-Skylark

